Category: Java


  • Breaking the interface barrier: CGLIB and ByteBuddy

    Welcome back! If you’ve been following along our journey through the world of Java proxies, you know we’ve spent a lot of time learning about the Proxy pattern and how it is used, its uses in various large libraries in the Java world, and even created a dynamic proxy using Java’s internal feature: The JDK Dynamic Proxy.

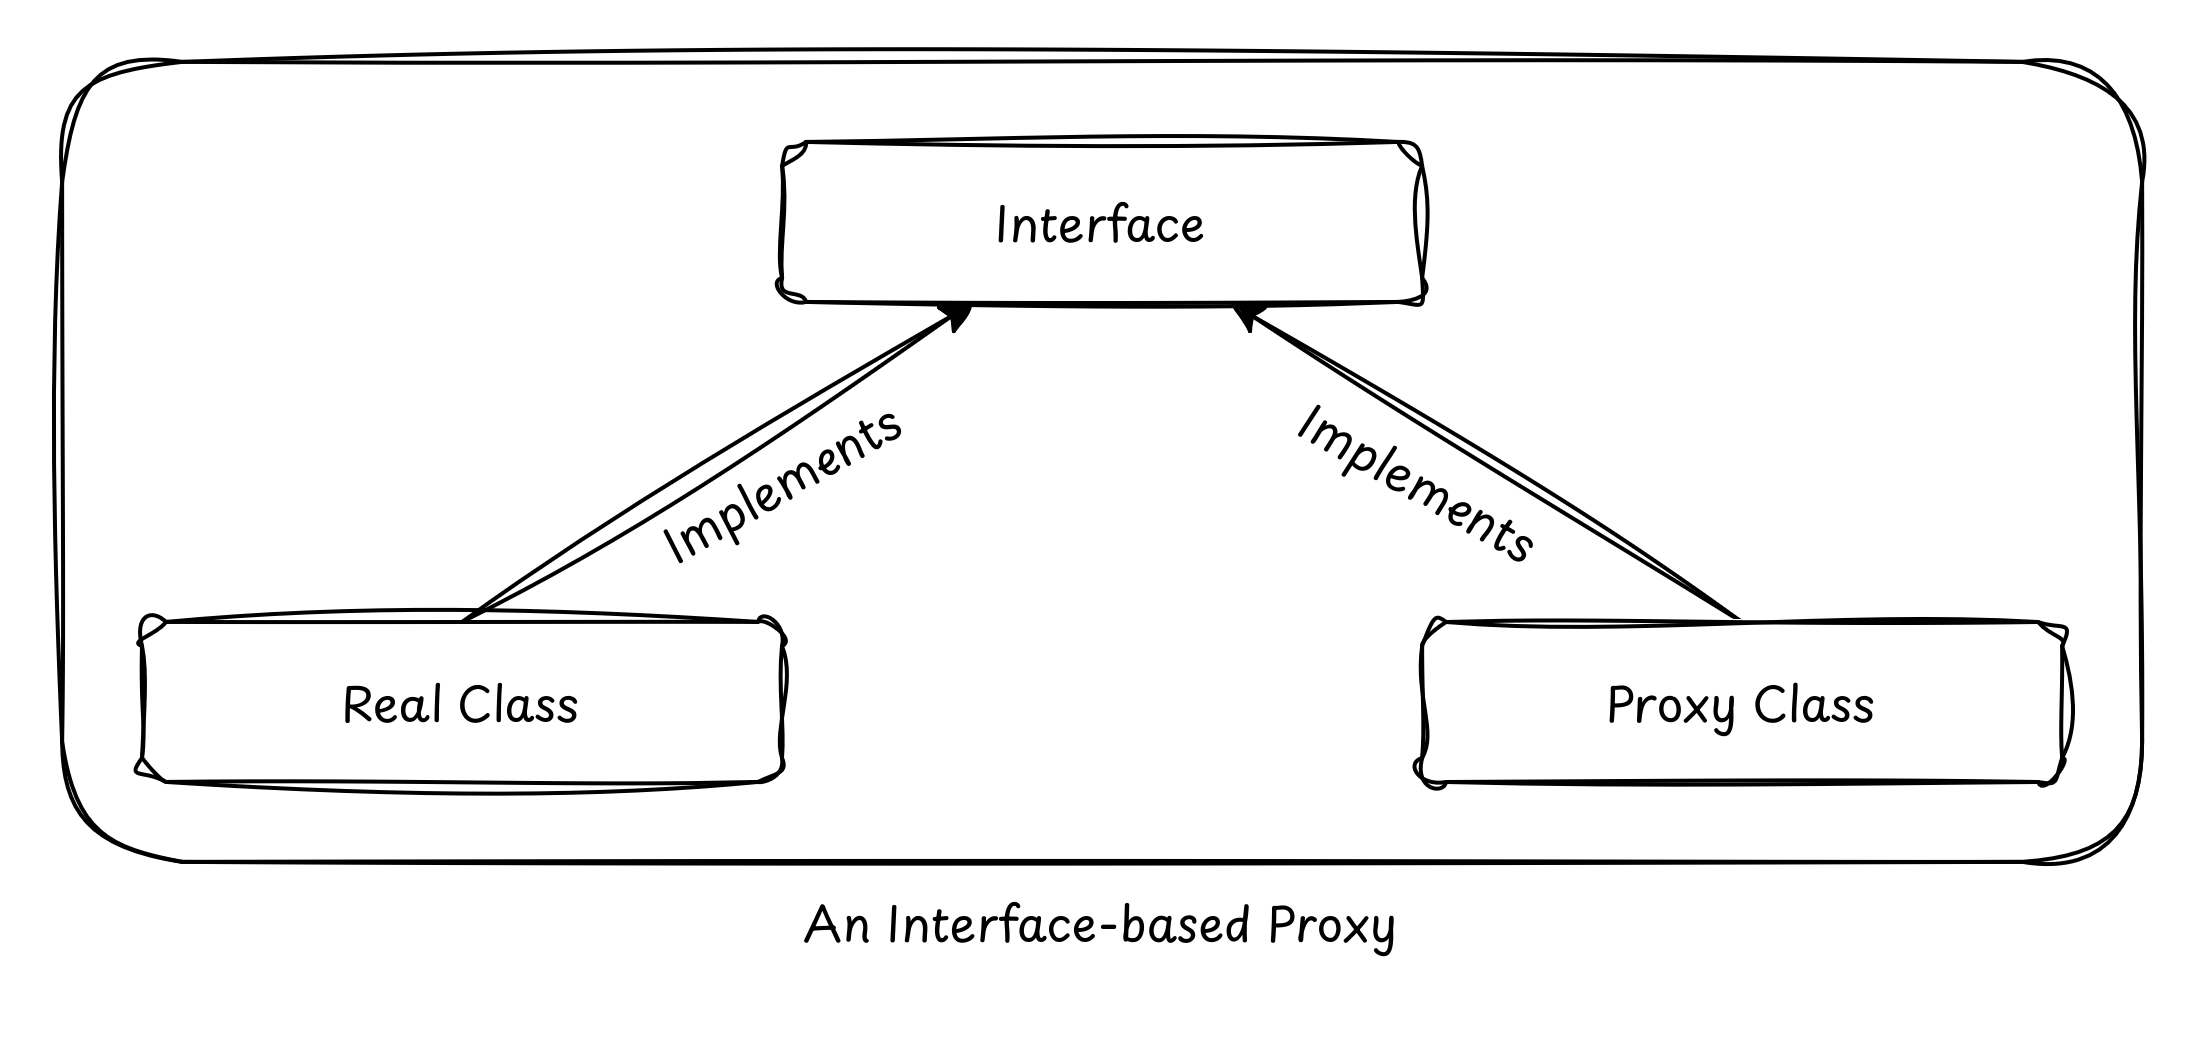
    While using JDK Dynamic Proxies is easy… after all, they’re built right into the JDK! You don’t have to import any third-party library in order to create a dynamic proxy. They are convenient and they are reliable… but, they’re a bit too restrictive. They only work with interfaces.

    What if the class you want to proxy doesn’t implement an interface? In that case, the JDK is going to look at your face and politely decline to help. But in the real world of Hibernate entities, Spring beans, and legacy monoliths, we often need to proxy classes directly. To break this interface barrier, we have to move away from high-level Java and start playing with the actual bytecode that makes up our classes.

    Class-based Proxies

    If you can’t use an interface to define a proxy, how do you do it? The answer is surprisingly simple in theory: Inheritance. Instead of creating a sibling class that shares an interface, we create a child class at runtime. This child class overrides the methods of the parent and inserts the extra logic (logging, transactions, security) before calling super.method().

    By becoming a subclass, the proxy is now an instance of the original class (thanks, polymorphism!), allowing it to be injected anywhere the original was expected. This is the bedrock of most Java frameworks, which rely on this “invisible” inheritance to add powerful features without forcing you to change a single line of your domain logic.

    But this capability didn’t appear overnight. Before we reached the modern landscape of bytecode engineering, the Java community relied on a singular, powerful tool to bridge the gap where the JDK fell short. To understand where we are going with modern solutions, we first have to look at the library that paved the way and defined an entire era of enterprise Java development.

    The history of CGLIB: The Fallen Giant

    For over a decade, CGLIB (Code Generation Library) was the undisputed king of class-based proxies. If you’ve ever looked at a stack trace in a Spring Boot application and seen something like UserService$$EnhancerBySpringCGLIB$$…, you’ve seen CGLIB in action.

    CGLIB sat on top of ASM, a very low-level bytecode manipulation library. It provided a “high-level” (at the time) API to generate subclasses on the fly. Its most famous tools were the Enhancer class and the MethodInterceptor interface.

    While revolutionary, CGLIB is now considered “legacy”. It hasn’t kept pace with the rapid evolution of Java. Since Java 9, the JVM has become much more restrictive about illegal reflective access, and CGLIB’s internal reliance on older ASM versions and dirty tricks for class loading started to cause headaches for developers moving to modern runtimes.

    The “Unsafe” instantiation

    One of the most notorious “dirty” tricks CGLIB employed (and a primary reason it has struggled with modern Java versions) is its use of the sun.misc.Unsafe API to instantiate proxy classes by skipping constructors entirely.

    To understand why this is a “trick,” we have to look at how Java normally handles objects. Usually, when you extend a class, your constructor must call super(). But what if the parent class doesn’t have a default constructor? Or what if the constructor does something heavy, like opening a database connection or throwing an exception?

    CGLIB wanted to create a proxy without triggering any of that parent logic.

    Here is a simplified look at the kind of “dirty” logic happening under the hood when you use CGLIB to proxy a class with a “difficult” constructor:

    import sun.misc.Unsafe;
    import java.lang.reflect.Field;
    
    public class DirtyInstantiator {
        public static void main(String[] args) throws Exception {
            // 1. Access the "Unsafe" instance via reflection 
            // (It's private, so we have to cheat)
            Field f = Unsafe.class.getDeclaredField("theUnsafe");
            f.setAccessible(true);
            Unsafe unsafe = (Unsafe) f.get(null);
    
            // 2. Imagine 'ProxyClass' is the subclass CGLIB generated
            // We can create an instance of it WITHOUT calling the constructor
            // even if the constructor is private or throws an exception!
            TargetClass proxyInstance = (TargetClass) 
                unsafe.allocateInstance(TargetClass.class);
    
            proxyInstance.doSomething();
        }
    }
    
    class TargetClass {
        public TargetClass() {
            // This code will NEVER run when CGLIB uses the 'Unsafe' trick
            throw new RuntimeException("You cannot instantiate me directly!");
        }
    
        public void doSomething() {
            System.out.println("Wait... how am I running? My constructor failed!");
        }
    }
    

    This technique is considered dirty for several reasons that affect the stability and security of your application:

    • Violates Language Guarantees: Java guarantees that a constructor will run before an object is used. By skipping it, CGLIB can leave internal fields uninitialized (null), leading to unpredictable NullPointerException errors later in the execution flow.
    • Encapsulation Breaking: It relies on sun.misc.Unsafe, an internal API that was never meant for public use. Starting with Java 9 and the Module System (Project Jigsaw), the JVM began strictly “encapsulating” these internals.
    • Security Risks: If a class has security checks in its constructor to prevent unauthorized instantiation, CGLIB’s trick bypasses those checks completely.
    • JVM Fragility: Because this relies on internal JVM behavior, an update to the OpenJDK can (and often does) break this logic, leading to the “Illegal Reflective Access” warnings that have plagued Spring developers for years.

    Modern libraries like Byte Buddy still have to deal with constructor issues, but they prefer using documented, “cleaner” ways to handle class definition, or they provide much more transparent ways to handle the super() call requirements.

    While Unsafe allowed CGLIB to perform technical miracles, they also turned the library into a “black box” that grew increasingly fragile as the Java platform matured. This fragility eventually created a vacuum in the ecosystem for a tool that could handle the raw power of bytecode manipulation without resorting to the “dirty” hacks of the past.

    This is precisely where the industry shifted. We moved away from libraries that try to trick the JVM and toward a framework that works with the JVM’s rules while providing a developer experience that feels like modern, idiomatic Java.

    Introducing Byte Buddy and the Fluent API

    If CGLIB is the aging rockstar of the 2000s, Byte Buddy is the modern virtuoso. Created by Rafael Winterhalter, Byte Buddy won the “Bytecode Wars” because it realized a simple truth: writing bytecode shouldn’t feel like writing assembly. It should feel like writing Java.

    The Philosophy: Type Safety and Simplicity

    Byte Buddy’s philosophy is built on moving away from the “stringly-typed” and reflection-heavy approach of CGLIB. Instead of passing strings or raw method objects around and hoping for the best, it uses a Fluent DSL (Domain Specific Language). This allows you to describe what you want the class to do in a way that the compiler can actually understand and validate, catching potential errors before your application even starts.

    Unlike its predecessors, which often felt like a black box of runtime magic, Byte Buddy is designed to be predictable. It doesn’t try to hide the fact that it’s generating a class; instead, it gives you a powerful, transparent set of tools to define exactly how that class should behave, ensuring compatibility with modern Java versions and the Module System.

    The Fluent DSL: Subclass, Method, Intercept

    To create a proxy in Byte Buddy, you follow a flow that reads like a sentence:

    • subclass(Target.class): “I want a new class that extends Target.”
    • method(ElementMatcher): “I want to target these specific methods.”
    • intercept(Implementation): “When those methods are called, do this.”

    ElementMatchers: The “SQL” of Methods

    One of the most powerful features of Byte Buddy is the ElementMatchers library. Instead of messy if statements, you select targets using declarative syntax like named("save"), isPublic(), or isAnnotatedWith(Transactional.class). These are composable using .and() and .or().

    Hands-on: Intercepting a UserService

    Let’s build a real-world example. We have a UserService and we want to measure the execution time of the save() method.

    Here is a minimal implementation that includes a basic dependency (a logger or simulated database) and a method that we can easily target for interception.

    public class UserService {
    
        // A concrete method with logic we want to 'wrap'
        public String save(String username) {
            System.out.println(">>> UserService: Persisting user '" + username + "' to database...");
            
            try {
                // Simulate some network or disk latency
                Thread.sleep(200); 
            } catch (InterruptedException e) {
                Thread.currentThread().interrupt();
            }
    
            return "SUCCESS: " + username + " is now in the system.";
        }
    
        // A method we might want to ignore or match differently
        public void delete(String username) {
            System.out.println(">>> UserService: Deleting user '" + username + "'...");
        }
    }
    

    Here, we implement the Interceptor, which is roughly equivalent to InvocationHandler we wrote while creating a JDK Dynamic Proxy. The Interceptor defines the “extra” logic that we want to inject in our proxy.

    import net.bytebuddy.implementation.bind.annotation.*;
    import java.lang.reflect.Method;
    import java.util.concurrent.Callable;
    
    public class PerformanceInterceptor {
        @RuntimeType
        public static Object intercept(
            @Origin Method method,            // The method being called
            @SuperCall Callable<?> zuper      // The original method logic
        ) throws Exception {
            long start = System.currentTimeMillis();
            try {
                return zuper.call(); // Execute super.save()
            } finally {
                System.out.println(method.getName() + " took " + (System.currentTimeMillis() - start) + "ms");
            }
        }
    }
    

    Let’s dig into the code a bit:

    • @Origin Method method: This is the standard java.lang.reflect.Method object. It is Byte Buddy’s way of handing you the “metadata” of the method being called. You can use this object to access the method name, its annotations, or its parameters without you doing any manual reflection.
    • @SuperCall Callable<?> zuper: This is the real secret sauce. Byte Buddy creates a special auxiliary class that knows how to call the original method in the parent class. By wrapping it in a Callable, you can decide exactly when, or even if, the original logic should execute.
    • The try/finally block: This ensures that even if the original method throws an exception, our timer still finishes. It is the standard way to implement reliable “around advice” in the AOP world.

    The last step is actually creating the proxy using Byte Buddy. Here we instruct JVM to build a new type.

    UserService proxy = new ByteBuddy()
        .subclass(UserService.class)
        .method(ElementMatchers.named("save"))
        .intercept(MethodDelegation.to(PerformanceInterceptor.class))
        .make()
        .load(UserService.class.getClassLoader(), ClassLoadingStrategy.Default.INWRAPPER)
        .getLoaded()
        .getDeclaredConstructor().newInstance();
    
    proxy.save("Alice");
    

    In the above snippet:

    • .subclass(UserService.class): This tells Byte Buddy to generate a new class in memory that extends our UserService. To the JVM, this new class is a legitimate child of the original.
    • .method(ElementMatchers.named("saveUser")): Think of this as a filter. Byte Buddy iterates through all methods available in the subclass and only applies our “advice” to the ones that pass this test.
    • .intercept(MethodDelegation.to(PerformanceInterceptor.class)): Here, we are “binding” the matched method to our interceptor. Byte Buddy is smart enough to see the annotations in our interceptor and figure out how to pass the right arguments into it at runtime.
    • .load(...): This is the bridge to the JVM. We have the bytecode in a byte array, but to use it, we need to define it through a ClassLoader. The INWRAPPER strategy is the most common approach, as it loads the proxy in a child class loader of the original class, preventing class-loading conflicts.
    • .getLoaded().getDeclaredConstructor().newInstance(): Finally, we treat the generated class like any other Java class. We grab its constructor and create an instance. This instance is what we pass around our application, and because of polymorphism, everyone thinks it’s just a regular UserService.

    Did you notice that we only proxied the save() method of UserService and not the delete()? Well this is another advantage of using Byte Buddy.

    In a JDK proxy, you are forced into a single InvocationHandler where you must handle every method call (including toString, equals, etc.) in one giant switch or if block. Byte Buddy allows you to be surgical. You can apply different interceptors to different methods within the same proxy definition.

    Why Byte Buddy is the current standard

    When you run the code above, Byte Buddy generates a class at runtime that effectively overrides the save method. But unlike CGLIB, Byte Buddy’s generated code is highly optimized. It uses “Inlining” where possible and avoids the heavy overhead of reflection during every method call.

    Furthermore, Byte Buddy handles the complexity of Java’s Module System (Project Jigsaw) gracefully. It knows how to “open” packages or define classes in a way that doesn’t trigger security exceptions on modern JVMs (Java 11, 17, and 21).

    In the next part, we’ll look at how these libraries handle “Redefinition” and “Rebasing”—techniques that allow you to modify existing classes rather than just creating subclasses. This is where we move into the territory of Java Agents and serious performance monitoring tools. For now, try running the Byte Buddy example and see if you can add a matcher that intercepts all methods except for those starting with “get”.


  • Proxies the Native Way: JDK Dynamic Proxies

    Welcome back to our series on Java Proxies! If you’ve been following along, we’ve already discussed the conceptual how and why of the Proxy Pattern, learned how to write a static proxy, introduced the idea behind dynamic proxies, and looked at how some of the Java giants like Spring, Hibernate, and Mockito use dynamic proxies to power features that you and I use every day.

    Now, it’s time to roll up our sleeves and look at the first “real” tool in our kit: JDK Dynamic Proxies.

    This is the native way to do things. No external libraries, no Maven dependencies, no other shenanigans. These are built right into the JDK in the java.lang.reflect package. They’re elegant, powerful, and a tad bit opinionated. Let’s dive in!

    Meet java.lang.reflect.Proxy

    In the early days of Java, if you wanted a proxy, you had to write it by hand. If you had 50 interfaces, you wrote 50 proxy classes. It was tedious, error-prone, and let’s face it: a bit boring!

    Enter the Reflection API. It gave Java the ability to look into a mirror.

    Just like you can inspect your face and your body by looking into a mirror, Reflection API allows a Java program to inspect its own classes, interfaces, fields, and methods at runtime. By using reflection, Java can “ask” an object what methods it has, and then execute them dynamically.

    The JDK Dynamic Proxy mechanism, introduced way back in JDK 1.3, allows you to create proxy instances at runtime. Instead of a .class file sitting on your disk for a specific proxy, the JVM generates the bytecode for the proxy class on the fly in memory.

    The star of the show is the java.lang.reflect.Proxy class. It provides a static method that is the “Open Sesame” of the proxy world:

    Object newProxyInstance(ClassLoader loader,
                            Class<?>[] interfaces,
                            InvocationHandler h)
    

    Think of this method as a factory. You give it a ClassLoader, a list of interfaces you want the proxy to “pretend” to be, and a “brain” (the InvocationHandler). In return, it hands you an object that implements all those interfaces.

    It does need an Interface

    Did you read the last paragraph carefully? You give it a ClassLoader, a list of interfaces you want the proxy to “pretend” to be, and a “brain” (the InvocationHandler). In return, it hands you an object that implements all those interfaces.

    Yes, JDK Dynamic Proxies have one non-negotiable rule. They only work with interfaces. If you have a concrete class (say, UserService) that doesn’t implement an interface, the JDK Dynamic Proxy cannot help you.

    Why the Interface constraint?

    It comes down to two things: How JDK Dynamic Proxy creates the proxy class, and how Java handles inheritance.

    Java doesn’t support multiple inheritance: You cannot create a class extending more than one parent class. However, a class can implement multiple interfaces at the same time.

    The proxy classes created by JDK Dynamic Proxy already extend java.lang.reflect.Proxy. In order to be a drop-in replacement of your real class, they’d also need to extend it: something that Java doesn’t allow. So they do the next best thing. They implement the same interface(s) implemented by your real class.

    This is why the newProxyInstance method takes Class<?>[] interfaces as one of its arguments. Your real class can implement multiple interfaces, hence all of those interfaces need to be passed on to the newProxyInstance method in order for it to create the proxy class.

    Understanding the InvocationHandler

    If the Proxy class is the body of our dynamic object, the InvocationHandler is the brain.

    In a standard Java setup, when you call a method on an object, the JVM knows exactly where the method’s code lives. But a dynamic proxy is created at runtime; it doesn’t have its own hardcoded logic. It needs a middleman to decide what happens when a method is triggered. That’s why the InvocationHandler is mandatory. It provides a centralized place to handle every single method call made to the proxy.

    It’s interface is simple, just one method:

    public Object invoke(Object proxy,
                         Method method,
                         Object[] args) throws Throwable;
    

    Here, proxy is the instance of the proxy itself, method is an object representing the specific interface method being called, and args is an array of objects containing the arguments to be passed to the method.

    Because every method call to the proxy funnels through this single point, you have total control. You can define the dynamic proxy’s behavior by providing your own implementation of the InvocationHandler interface, and by doing so, you can inject functionality before or after the actual method call.

    Moreover, you can even decide whether you want to call the actual method or not. For example, for dynamic proxies created for Mockito.spy(), the actual method is called only if there isn’t a subbing present for it.

    Be careful, though

    You might have noticed that invoke() takes an instance of proxy as one of its arguments. It might be tempting for you to use it inside the InvocationHandler – but be very careful.

    If you call a method on the proxy instance itself inside the invoke method (for example, proxy.toString()), the JVM will intercept that call too and send it right back to invoke. This creates an infinite loop that ends in the dreaded StackOverflowError. Usually, if you need to call a method, you should call it on the target (the real object), not the proxy.

    Hands-on: Building a Generic LoggingHandler

    Enough theory, isn’t it? Now let’s build something!

    Let’s build a dynamic proxy that logs the execution time and arguments of every method call in your application… without sprinkling log.info() statements everywhere. We’ll create an InvocationHandler implementation that does that, and then use it to create a proxy for a real class containing business logic. Here goes:

    First of all, let’s build an InvocationHandler implementation that logs the arguments and execution time:

    import java.lang.reflect.InvocationHandler;
    import java.lang.reflect.Method;
    import java.util.Arrays;
    import org.slf4j.Logger;
    import org.slf4j.LoggerFactory;
    
    public class LoggingHandler implements InvocationHandler {
        private static final Logger log = LoggerFactory.getLogger(LoggingHandler.class);
        private final Object target;
    
        public LoggingHandler(Object target) {
            this.target = target;
        }
    
        @Override
        public Object invoke(Object proxy, Method method, Object[] args) throws Throwable {
            log.info(">>> Entering: {}", method.getName());
            log.info(">>> Arguments: {}", (args == null) ? "[]" : Arrays.toString(args));
    
            long start = System.nanoTime();
    
            // This is where we call the ACTUAL method on the ACTUAL object
            Object result = method.invoke(target, args);
    
            long end = System.nanoTime();
    
            log.info(">>> Result: {}", result);
            log.info(">>> Time taken: {}ns", (end - start));
    
            return result;
        }
    }
    

    Let’s decode what’s happening in the above piece of code:

    • We created a class LoggingHandler that implements InvocationHandler.
    • We overrode invoke(), and inside, we wrapped the actual method call – method.invoke(target, args) with logging statements that specified entry, exit, and execution time of the method.
    • The result returned by the actual method call was also returned by invoke().

    Notice that we haven’t defined our business logic as yet. The dynamic nature of this proxy means that any suitable Java method can be proxied and passed on to invoke() to log its vitals.

    Anyway, let’s now build a simple calculator to show this dynamic proxy in action.

    As required by JDK Dynamic Proxy, let’s define an interface first:

    public interface Calculator {
        int add(int a, int b);
        int multiply(int a, int b);
    }
    

    And a simple, bare-bones implementation:

    public class RealCalculator implements Calculator {
        public int add(int a, int b) { return a + b; }
        public int multiply(int a, int b) { return a * b; }
    }
    

    Now let’s put this all together:

    public class Main {
        public static void main(String[] args) {
    
            // 1. Create the real object
            Calculator realCalc = new RealCalculator();
    
            // 2. Create the logging handler
            LoggingHandler handler = new LoggingHandler(realCalc);
    
            // 3. Create the Proxy
            Calculator proxyCalc = (Calculator) Proxy.newProxyInstance(
                    Calculator.class.getClassLoader(),
                    new Class[] { Calculator.class },
                    handler
            );
    
            // 4. Use the proxy!
            int sum = proxyCalc.add(5, 10);
            int product = proxyCalc.multiply(3, 4);
        }
    }
    

    If you execute the Main class now, you will see logging statements detailing the entry, exit, and time taken for both add() and multiply() methods.

    Notice how we didn’t add any logging statements to the real add() and multiply() methods – the proxy took care of it! When you called proxyCalc.add(5, 10), the JVM didn’t go to RealCalculator. It went to LoggingHandler. The handler printed the logs, then used Reflection (method.invoke) to call the real add method on realCalc.

    Performance Considerations

    A common question is: “Is this slow?”

    In the early days of Java, Reflection was indeed slow. However, modern JVMs are incredibly good at optimizing Dynamic Proxies. After a few calls, the JIT (Just-In-Time) compiler can often inline these calls, making the overhead negligible for most business applications.

    That said, if you are calling a method millions of times per second in a tight loop, you might want to measure the impact. But for 99% of use cases (Spring @Transactional, Hibernate Lazy Loading, etc.), it’s plenty fast!

    Wrapping Up

    The JDK Dynamic Proxy is a beautiful example of the “Open-Closed Principle” in action. You can add behavior (logging, security, caching) to any interface without changing a single line of the original code.

    Key Takeaways:

    • Built-in: No extra libraries needed.
    • Interface-based: Your target must implement an interface.
    • Centralized: All calls go through one InvocationHandler.

    In the next part of this series, we’ll tackle the limitation we found today: What if we don’t have an interface? That’s where CGLIB and Byte Buddy enter the ring. Stay tuned!


  • Understanding Proxy Patterns: The Why and How of Static and Dynamic Proxies in Java

    In the previous post, we talked about Spring’s @Transactional annotation, and saw how it does its magic with Spring AOP, thanks to the unsung hero working behind the scenes: dynamic proxies.

    That got me thinking: why stop there? Proxies are used all the time in Spring, so why not do a deeper dive under the hood to understand how they work?

    So today, I’m excited to kick off a series of posts dedicated to unlocking the power of dynamic proxies! Think of them as your secret weapon for writing cleaner code. You can package up all that repetitive boilerplate just once, and then use simple annotations to sprinkle the functionality anywhere you need it. It’s like writing a superpower and then handing it out to your entire codebase.

    We’ll start our journey with the classic Proxy pattern from the Gang of Four’s famous book, Design Patterns. We’ll connect the dots between this pattern and the dynamic proxies that frameworks like Spring use every day. To make sure we’re all on the same page, we’ll even build a simple static proxy together first.

    And because the best way to learn is by doing, we’ll do a capstone project at the end, where we will build our own annotation: @MyTransactional, mimicking the functionality of Spring’s @Transactional.

    So, whether you’re completely new to proxies or you’re looking to get handy with advanced tools like ByteBuddy, pull up a chair! I hope this series will be a friendly and practical guide for you, and you’ll have a better understanding of dynamic proxies at the end.

    Let’s start with the Proxy Pattern

    A proxy is used when you want to add a layer of control between the client calling a method and the actual object (the “Real Subject”) executing it. At its core, the Proxy Pattern provides an object that represents another object.

    If that sounds a bit abstract, no worries—let’s break it down with an example.

    Imagine you have a Client who wants to use a service, which we’ll call the Subject. Normally, the Client could just talk directly to the Subject to get what it needs.

    Now, let’s say our Subject is actually an interface. The real work is performed by a class called the Real Subject, which implements that interface.

    This is where our Proxy comes in! It steps in between the Client and the Real Subject. When the Client calls a method on the Subject, the Proxy intercepts that call before it reaches the Real Subject. This gives the Proxy a chance to do some extra work either before passing the request along or after getting the result back.

    So, what kind of “extra work” can this proxy do? Lots of useful things!

    • Playing Bouncer (Access Control): “Hold on, do you have the right permissions to make this call?”
    • Being Lazy (Lazy Initialization): “I won’t create this heavy object (like a huge file or database connection) until I absolutely have to.”
    • Being a Messenger (Remote Invocation): “The real object is actually on another machine? No problem, I’ll handle the long-distance communication for you.”
    • Handling the Annoying Stuff (Cross-Cutting Concerns): “I’ll automatically take care of logging, caching, or starting a transaction so the main object doesn’t have to.”

    The beauty of all this? Your Real Subject can stay clean and focused purely on the business logic. All the other important but repetitive tasks are handled by the proxy. It’s like having a dedicated assistant that takes care of all the prep work and clean-up!

    Building a Static Proxy

    Alright, we’ve learned what a Proxy is. Now let’s roll up our sleeves and build one together in Java!

    First up, we need to define our Subject. Think of this as the contract for a service our client wants to use.

    interface Subject {
        void execute();
    }
    

    This simple interface has just one method: execute(). Next, let’s create the real deal, our RealSubject, which does the actual heavy lifting:

    public class RealSubject implements Subject {
    
        @Override
        public void execute() {
            System.out.println("Performing an expensive operation.")
            // an operation
        }
    }
    

    And now for the star of the show: the Proxy itself! It also implements the Subject interface, acting as a helpful middleman.

    public class SubjectProxy implements Subject {
        private RealSubject realSubject = new RealSubject();
    
        @Override
        public void execute() {
            System.out.println("Proxy intercepting Real Subject's operation")
            // logging the method call
            // passing control to real subject  
            realSubject.execute();
        }
    }
    

    Finally, our client code simply interacts with the proxy, blissfully unaware of the extra steps happening behind the scenes.

    public class Client {
        private Subject subject = new SubjectProxy();
        public void call() {
            subject.execute();
        }
    }
    

    As you can see, the beauty of the proxy is its ability to seamlessly add its own functionality before or after the real method is called. And just like that, you’ve created a clever helper that can manage, secure, or monitor access without changing the real object!

    The Problem with Doing it Manually

    Our SubjectProxy works great for a simple example. But imagine you’re working on a massive enterprise application with hundreds of services. If you wanted to add logging or transaction management to every single one of them using this “static” approach, you’d have to write a separate proxy class for every single service interface.

    That’s a lot of boilerplate! It’s tedious, error-prone, and—let’s be honest—not very “engineer-y.” This is what we call the N+1 Class Problem: for every business class you write, you’re forced to write a corresponding proxy class.

    There has to be a better way, right?

    Enter the Dynamic Proxy: The Automated Middleman

    If static proxies are like hand-writing a custom contract for every single person you meet, Dynamic Proxies are like having a smart template that writes itself the moment it’s needed.

    The core idea is simple: instead of us writing SubjectProxy.java, we tell the Java Virtual Machine (JVM) at runtime: “Hey, I need an object that looks like this interface, but whenever someone calls a method on it, send that call to this single ‘Handler’ class I’ve written.”

    To give you a little teaser, here is how you create a dynamic proxy in just a few lines of code using the built-in JDK tools:

    // Our single "Handler" that handles EVERY method call for EVERY interface
    InvocationHandler handler = (proxy, method, args) -> {
        System.out.println("Dynamic Proxy intercepting: " + method.getName());
        return method.invoke(realSubject, args);
    };
    
    // The Magic: Creating the proxy instance on the fly
    Subject dynamicProxy = (Subject) Proxy.newProxyInstance(
        Subject.class.getClassLoader(),
        new Class<?>[] { Subject.class },
        handler
    );
    
    dynamicProxy.execute(); // This call is intercepted by our handler!
    

    Don’t worry if this code seems unfamiliar to you. We’ll get to know more about JDK dynamic proxies further along in the series. But do notice their power here: we didn’t write a class called SubjectProxy. We generated it while the program was running. If we had 100 different interfaces, we could use this same logic to handle all of them. No more N+1 problem.

    Summary & What’s Next

    We’ve traveled from the classic design pattern to the reality of “manual labor” with static proxies. We’ve also seen a glimpse of how Java allows us to generate these middlemen dynamically to save us from drowning in boilerplate.

    But is this just a neat trick for lazy developers? Far from it.

    In the next post, we’re going to step out of our “Hello World” examples and look at Real-World Magic. We will do a deep dive into how the giants of the Java ecosystem: Spring, Hibernate, and Mockito, use these dynamic proxies to power the features we use every day. We’ll look at how the @Transactional annotation works under the hood using proxies, how Hibernate manages to load data only when you ask for it, and how Mockito is able to simulate a method call and return mocked data.

    Stay tuned for Part 2. It’s going to get interesting!


  • The Proxy Paradox: Why Spring @Transactional Vanishes

    We’ve all been there. You annotate @Transactional on a critical method in your Spring application, run mvn test, watch the green checkmarks fly by, and feel good about yourself. Everything’s going swell innit?

    But then you open the transaction log and find… nothing. Where did your transaction go?

    No connection enlisted. No timeout. No rollback on error. The code did execute, but a transaction was not created.

    Congratulations, you’ve just met the Proxy Paradox. The coding equivalent to plugging in your phone overnight and waking up to 7% battery.

    Stick around for a few minutes, and you’ll know why this happens, and how to mitigate this behavior with some well-known patterns.

    Understanding Spring AOP

    The seeds of this bug are planted in Spring’s Aspect Oriented Programming (AOP).

    In Spring, AOP is used to decouple cross-cutting concerns (like logging, security, or transactions) from your core business logic to keep code modular. It achieves this by wrapping your beans in dynamic proxies that intercept method calls to inject this extra behavior at runtime — without modifying the original code.

    Spring AOP is how @Transactional annotation works in the first place.

    When a Spring container starts up, it scans your beans. It asks, “Hey, does this class have any aspect-related annotations, like @Transactional, @Async, or @Cacheable?”

    If the answer is yes, it doesn’t give you the raw bean. It wraps that bean in a proxy (either a JDK dynamic proxy or a CGLIB-generated subclass). This wrapper intercepts calls from the outside world and funnels them through an interceptor chain.

    However, the interceptor chain does not come into picture if a call comes internally, i.e., from within the class.

    The Bug in action

    Take a look at the following code snippet:

    @Service
    class WalletService {
    
        // The entry point
        public void pay(BigDecimal amount) {
            // The internal call causing the issue
            withdrawMoney(amount); 
        }
    
        @Transactional
        public void withdrawMoney(BigDecimal amount) {
            // ... complex logic with database writes ...
        }
    }
    

    Here, withdrawMoney() is marked @Transactional. Any calls to this method from outside of WalletService (say, a controller) work as expected. The call goes through the proxy, a transaction is started, and then the raw bean’s method is executed.

    However, if the call to withdrawMoney() comes through pay(), it executes non-transactionally.

    Why? Because the call to withdrawMoney() happens inside the raw bean, bypassing the proxy completely. Spring’s TransactionInterceptor never comes into picture. No connection is bound to the thread. No commit. No rollback.

    But… sometimes it works!

    If you have a colleague who claims that this works, they’re probably using AspectJ Load-Time Weaving:

    @EnableTransactionManagement(mode = AdviceMode.ASPECTJ)
    

    AspectJ is different. It doesn’t use proxies; it modifies the actual bytecode of your class during class loading. It literally weaves the transaction logic into your original method.

    • Pros: Self-invocation works perfectly.
    • Cons: Requires a special Java agent, adds complexity to the build process, increases startup time, and is generally overkill for standard web apps.

    Practical Fixes

    So, you’re stuck with the proxy issue. How do you fix it? Here are the top 5 solutions, ranked from “Best Practice” to “Please Don’t Do This”:

    1. Refactor (Recommended)

    Move withdrawMoney() to its own @Service:

    @Service
    class PaymentService {
        private final WalletService walletService; // Inject dependency
        
        public void pay(BigDecimal amount) {
            walletService.withdrawMoney(amount); // External call!
        }
    }
    

    This is the cleanest solution. It fits SOLID principles, and makes unit testing much easier.

    2. Self-Injection

    You can actually ask Spring to inject the proxy into the bean itself:

    @Service
    class WalletService {
        @Lazy 
        @Autowired 
        private WalletService self;
    
        public void pay(BigDecimal amount) {
            self.withdrawMoney(amount); // Goes through the proxy
        }
    }
    

    This works, but feels weird. It also makes use of Field Injection, which is not considered a best practice.

    This approach will not work at all if you use Constructor Injection (you will be hit with circular reference errors).

    3. Programmatic Transactions

    Why not introduce an explicit transaction?

    transactionTemplate.execute(status -> {
        withdrawMoney(amount);
        return null;
    });
    

    This is the easiest and simplest fix. It does add some boilerplate code, but clarity beats magic any day.

    4. AopContext.currentProxy()

    You can force the method call through the AOP Proxy:

    ((WalletService) AopContext.currentProxy()).withdrawMoney(amount);
    

    This will route the internal method call through the proxy. This works, but it makes the AOP abstraction leaky. Your business logic is forced to learn framework details. Purists will frown at this, but it will also come in your way if you want to migrate to AspectJ later. Use sparingly.

    5. AspectJ Load-Time Weaving

    We’ve seen this earlier:

    @EnableTransactionManagement(mode = AdviceMode.ASPECTJ)
    

    This is great if you want self-invocation across thousands of beans. But it introduces a lot of complexity, and is rarely worth it for a handful of cases.

    Summary

    The Proxy Paradox is a rite of passage for Spring developers. Just remember the flow:

    1. External Call → Proxy → Aspects run → Logic runs.
    2. Internal Call → Raw this object → Logic runs (No Aspects).

    Re-organize your methods, self-inject if you must, or drop down to TransactionTemplate—but never trust @Transactional on a self-invoked method again.


    Sound Off: What quirky Spring “gotcha” cost you the most debug minutes? Drop a comment below with the annotation that betrayed you!


  • The Dependency Injection Dilemma: Why I’m Finally Ghosting @Autowired on Fields

    In the world of Spring Boot development, we are often seduced by “magic.”

    We love the annotations that make 50 lines of boilerplate vanish. We love the auto-configuration that “just works.” And for a long time, the poster child for this magic was the @Autowired annotation sitting snugly atop a private field. It looks clean, it’s remarkably easy to write, and it feels like the pinnacle of modern Java productivity.

    But as I’ve spent more time in the trenches of large-scale enterprise architecture, I’ve realized that field injection is a siren song. It promises a shortcut but leads you straight into a rocky shore of un-testable code, hidden dependencies, and runtime nightmares.

    Today, I’m making the case for the “Old Reliable” of the Java world: Constructor Injection. It’s time to stop using field injection, and it’s not just because the Spring documentation tells you to. It’s because your architecture deserves better.

    The Aesthetic Trap: Why we fell in love with Field Injection

    Before we tear it down, we have to acknowledge why we used it in the first place. Take a look at the following code snippet:

    @Service
    public class OrderService {
    
        @Autowired
        private UserRepository userRepository;
    
        @Autowired
        private PaymentService paymentService;
    
        @Autowired
        private InventoryClient inventoryClient;
    
        // Business Logic...
    
    }
    

    It’s undeniably sleek. There are no bulky constructors taking up half the screen. It feels like the “Spring Way.” For years, this was the standard in tutorials and stack overflow answers. It allowed us to add a dependency with a single line of code.

    However, this “cleanliness” is a visual illusion. It’s like hiding a messy room by shoving everything into a closet. The room looks clean, but you’ve actually made the system harder to manage.

    The Case for Immutability

    As engineers, we should strive for Immutability. An object that cannot change after it is created is inherently safer, more predictable, and easier to reason about in a multi-threaded environment.

    When you use field injection, you cannot declare your dependencies as final. Spring needs to be able to reach into your object after the constructor has run to inject those fields via reflection. This means your dependencies are technically mutable.

    By switching to Constructor Injection, you regain the ability to use the final keyword:

    @Service
    public class OrderService {
        private final UserRepository userRepository;
        private final PaymentService paymentService;
        private final InventoryClient inventoryClient;
    
        public OrderService(
            UserRepository userRepository, 
            PaymentService paymentService,
            InventoryClient inventoryClient) {
            this.userRepository = userRepository;
            this.paymentService = paymentService;
            this.inventoryClient = inventoryClient;
        }
    }
    

    Now, your class is “Born Ready.” Once the OrderService exists, you have a 100% guarantee that the userRepository is there and will never be changed or set to null by some rogue process. This is the foundation of thread safety and defensive programming.

    The Case for Unit Testing

    If you want to know how good your architecture is, look at your unit tests. If your test setup looks like a ritualistic sacrifice, your architecture is broken.

    Field injection makes unit testing unnecessarily difficult. Because the fields are private and Spring is doing the heavy lifting behind the scenes, you can’t simply instantiate the class in a test. You have two bad options:

    1. Use Spring in your tests: You use @SpringBootTest or @MockBean. Now your “unit” test is starting a miniaturized version of the Spring Context. It’s slow, it’s heavy, and it’s no longer a unit test! (Hint: It’s an integration test!)
    2. Use Reflection: You use ReflectionTestUtils to manually “shove” a mock into a private field. This is brittle. If you rename the field, your test breaks, but your compiler won’t tell you why.

    With Constructor Injection, testing is a breeze. Since the constructor is the only way to create the object, you just pass the mocks in directly:

    @Test
    void shouldProcessOrder() {
        UserRepository mockUserRepo = mock(UserRepository.class);
        PaymentService mockPaymentService = mock(PaymentService.class);
        InventoryClient mockInventoryClient = mock(InventoryClient.class);
    
        // Standard Java. No magic. No Spring. Fast.
        OrderService service = new OrderService(mockUserRepo, mockPaymentService, mockInventoryClient);
    
        service.process(new Order());
    }
    

    Failing Fast: The 2:00 AM Production Bug

    We’ve all been there. You deploy a change, the app starts up fine, and everything looks green. Then, at 2:00 AM, a specific user hits an edge-case API endpoint, and the logs explode with a NullPointerException.

    Why? Because with field injection, Spring allows the application to start even if a dependency is missing or circular. The field just remains null. You don’t find out until the code actually tries to use that field.

    Constructor Injection is your early warning system. Because Spring must call the constructor to create the bean, it must satisfy all dependencies immediately. If a bean is missing, the ApplicationContext will fail to load. The app won’t even start on your machine, let alone in production.

    I’d much rather spend 5 minutes fixing a startup error on my local machine than 5 hours explaining to a stakeholder why the payment service crashed in the middle of the night.

    The Single Responsibility Principle

    The Single Responsibility Principle (SRP) states that a class should have one, and only one, reason to change.

    Field injection makes it too easy to violate this. Because each dependency is just one line of code, you don’t notice when a class starts doing too much. I’ve seen services with 15 @Autowired fields that looked “neat” on the screen.

    When you use Constructor Injection, a class with 15 dependencies looks like a monster. The constructor is massive. It’s hard to read. It’s ugly.

    And that is exactly the point. That “Constructor of Doom” is a signal. It’s the code telling you: “Hey, I’m doing too much. Please refactor me into smaller, more focused services.” Field injection is like a layer of makeup that hides a skin infection; Constructor Injection forces you to see the problem and treat it.

    Circular Dependencies: The Infinite Loop

    Circular dependencies (Service A needs B, and B needs A) are usually a sign of poor design. However, field injection allows them to happen almost unnoticed. Spring will try to resolve them using proxies, often leading to confusing behavior.

    Constructor Injection doesn’t allow circular dependencies by default. If you try it, Spring will throw a BeanCurrentlyInCreationException.

    While this might seem like a nuisance, it’s actually a guardrail. It forces you to rethink your service boundaries. Usually, a circular dependency means you need a third service (Service C) to hold the shared logic, or you need to move to an event-driven approach.

    The Lombok Cheat Code

    The most common pushback I hear is: “But I don’t want to write and maintain constructors for 200 services!”

    I agree. I’m a programmer; if I can automate a task, I will. This is where Project Lombok becomes your best friend.

    By using the @RequiredArgsConstructor annotation, you get the best of both worlds. You declare your fields as private final, and Lombok generates the constructor at compile time.

    @Service
    @RequiredArgsConstructor
    public class OrderService {
        private final UserRepository userRepository;
        private final PaymentService paymentService;
        private final InventoryClient inventoryClient;
    
        // No manual constructor needed!
    }
    

    Professionalism is in the Details

    At the end of the day, using Constructor Injection is about intentionality. It’s about making a conscious choice to write code that is framework-independent, easy to test, and architecturally sound. It’s about moving away from “Spring Magic” and moving toward “Java Excellence.”

    If you’re working on a legacy codebase filled with @Autowired fields, don’t panic. You don’t have to refactor everything tonight. But for every new service you write, try the constructor approach. Notice how your tests become simpler. Notice how your classes become smaller.

    Your code is a reflection of your craftsmanship. Don’t let a shortcut like field injection be the thing that undermines it.


    What’s your take?

    Are you a die-hard @Autowired fan, or have you embraced the constructor? Let’s talk about it in the comments. If you found this helpful, consider sharing it with a junior dev who is still caught in the “Field Injection Trap.”